 Thoughts about organizing some badly needed early spring lawn care, are often triggered by noticing the rising temperature. That and the days beginning to lengthen. Especially after a particularly hard winter our lawns may have taken a bit of a battering. Heavy snowfall, hard frosts and water logging will all damage the lawn.
A well cared for lawn will without doubt compliment the other areas of the garden.
So taking the time and the trouble in the springtime will pay dividends in the later months. Showy shrubs and flowers when in full bloom will look much better with a well-cared for lawn as the backdrop.
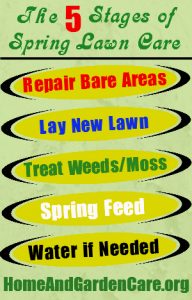
A lawn care schedule need not be a difficult task if you follow the proper basic steps required. In spring, most of what we will be doing is making repairs to any damage caused throughout the rest of the year. We have listed them below.
Table of Page Contents
Early Spring Lawn Care Tasks
- This could be repairing bare areas of grass using seed or turf.
- It may even be a whole area of grass that we want to turf.
- Treatment of the weeds and moss that have accumulated.
- Provide some feed to strengthen the grass.
- Give the lawn their first cuts the right way.
Repairing Bare Areas of Grass
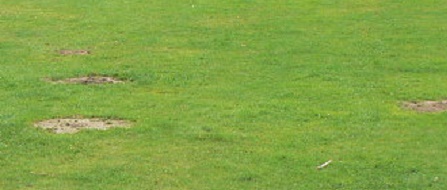
To start, your spring lawn care plan should begin with an inspection of all grassed areas in the garden. Bare patches can appear in your lawn after a harsh winter and now’s the time to make repairs. There are two ways that this can be tackled. Either reseeding or replacing with turf patches.
Filling the patches with turf will give an instant cure to the problem. Although it can be a tricky process for those new to lawn care, especially if a large area needs attention.
Repairing The Lawn With Turf
Before starting you will need to measure the damaged area that needs replacing. If quite small you might be able to take out an area of grass from your garden that is of little consequence. Although for larger areas you will have to source your turf from your local supplier.
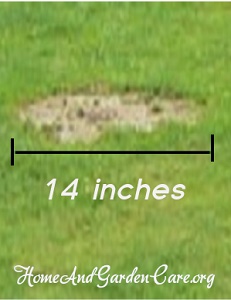 To mend small patches, cut out an area of sod to the size you measured earlier. Using an edging iron or a strong sharp knife will do the job adequately. Cut down through the soil about 2 inches.
After cutting vertically through the sod, take a flat spade and push it in horizontally. Take a sod out that still has about 1.5 to 2 inches of soil attached. This ensures that you have plenty of root left on the turf.
Keeps Sods Quite Small
Don’t make these sods to large as you will have to carry them and work with them. Rolls of turf cut with professional equipment will be around 3 feet long and a 1.5 foot wide. I wouldn’t advise you to cut out anything this size as you may well lose the uniformity of the turf depth.
Keeping the turf thickness uniform is important and will save a lot of trouble when bedding it into the new position. For small patches you could easily take the size mentioned in 3 separate pieces if you needed that much.
Lay the new turf you have prepared on top of the old worn area of grass. Do much the same as you did earlier this time using the new turf as your gage. Cut into the soil about 2 inches using the edging iron or a knife. Once again use the flat spade to skim off the worn turf.
Try the sod in the depression for size, it should fit pretty well or even be a bit high. Don’t worry about that at this stage.
Prepare the new Area
Plants need feeding and grass is no exception. Plus the fact, the soil may well be compacted and need to be aerated. This is an excellent opportunity to perform both tasks which will ensure healthy growth.
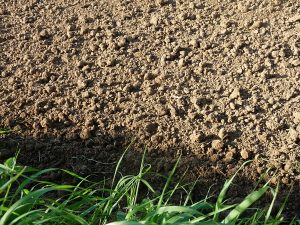 Lightly fork the earth below where the old turf was to a depth of 3 to 4 inches. Sprinkle in some pelleted feed onto the soil and work it in while raking the area smooth. The next stage is to tamp the soil back down again using your foot. Leave a depression of 2 inches for the turf to fit into. If the area is quite large, firm the soil by shuffling across it. Or use a plank of wood and tread on this.
Obviously we don’t want to undo the aerating work we have done previously while doing this. Which means not stamping and jumping on the prepared area.
Just a point about aerating. I wouldn’t consider carrying this out on the whole lawn as part of an early spring lawn care schedule. It’s much to early and would be better done when the grass has had a few cuts and growing stronger.
For more information regarding this lawn treatment read the Step N Tilt lawn core aerator review and the tow behind aerator review.
You will now have accomplished the most difficult part of patching up a bare spot on your lawn. Pat yourself on the back and perhaps you are wondering now why you were a bit apprehensive about tackling it. The next stage of this lawn care job is the easy part.
In fact if you’re new to gardening, why not read our post about How to Start Your First Garden.
To continue on, where you have trodden the soil you will have to give it a shallow rake to create a fine tilth. Next lay you sods into the depression and pat them down to bed them in. Butt them up as close to the edge of the old turf as much as you can. If it won’t butt up close don’t worry too much at this stage. Adding a handful of soil and compacting it into any gaps will do the trick.
Ensure Turf is in Contact with the Soil
And so The important thing here is to ensure that there are no air gaps underneath the turf. The roots need to grow down into this newly prepared soil. The image above shows turf being trimmed off at the edge of a pathway.
If you have quite a large area of turf to lay then lay the strips the way you see brickwork laid. Staggering the joints will vastly improve the success and look of your new lawn.
If you have a lawn mower with a roller you can roll it across the new turf a few times to help blend in any bumps. For smaller areas lay a plank on the turf and walk on the plank. Don’t walk on the new turf until it settles in to avoid leaving footprints.
WARNING: DON’T FORGET TO WATER IF THE WEATHER IS DRY
Reseeding Bare Patches
How ever Most people will be able to reseed a lawn. You can pick up kits readily that make the job really very simple.
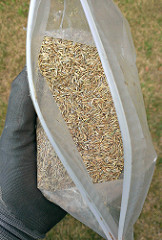 Along with the seed, on many occasions there will be slow release feeding included. The instructions will keep you right on how to carry out the procedure.
The more experienced gardeners will probably have grass seed stored somewhere dry. Lawn care is an ongoing job and having spare seed to hand is always handy.
Don’t be tempted to just scatter some seed onto the bare patch and hope for the best. This will simply be a waste of your time. The seed won’t survive without soil to send its roots down into. More often than not, the bare patch will consist of a thatch of dead matted grass. (See Example Below). Instead, do the same as we described with replacing turf. Skim off the dead grass and lightly fork the soil to aerate it.
 Now prepare the mix you intend to fill the hole with. If using a mix of topsoil/compost, add a small amount of dry feed.
The feed will give the seed the best chance to grow. Tamp it down to compact it a bit. Add more soil to make it level with the surrounding area and tread on it again. Rake the area to create a fine tilth.
Now simply sprinkle the seed by hand over the area and rake it in. Lightly water with a fine rose watering can.
Avoid over watering as this will cause the water to form pools. This causes the seed to float into these pools leaving the rest of the area without seed.
Another Ueful Method
Then again, Another method I like to use is to have some seed mixed with moist sand. I place it in a warm area to get the germination process started quicker.
Sprinkle this sand and seed mix onto the prepared area, give a light covering of compost and water lightly. Using this method you will see the grass coming through much quicker due to the seed already being germinated.
Perhaps you can give this method a try when performing next year’s spring lawn care maintenance. The same applies as above about over watering.
 It’s important to keep the new seeded area moist at all times. If there is rain, that’s ideal. No rain, you should make a point to water at least once a day.
That’s if you’re carrying out this procedure during early spring. If sowing the seed later in the year when the weather is warmer, obviously you will need to water more frequently. Just use common sense.
Leave these newly sown patches until the grass has grown about 4 inches in height before considering cutting. Continue with your regular mowing routine, but avoid going over these patched areas for a time.
Applying Feed as Part of Your Lawn Care
Late In autumn, Moss would normally have been treated as part of the annual lawn care schedule. However, if the weather was not suitable at the time or the task for some reason was not completed, early spring is the next best window when this can be conducted with good success.
The image opposite shows a spreader which is a good idea when your lawn is quite large. Although a smaller lawn could easily be treated spreading by hand. If doing it by hand mark out strips of the lawn in yard/metre intervals by laying 6 foot canes flat on the ground.
You could safely give the lawn a dressing of spring feed and moss killer at your first chance of decent weather. Leave this for a couple of weeks to work. The moss might well turn black, then you can set about raking the moss out using a spring tine type of grass rake.
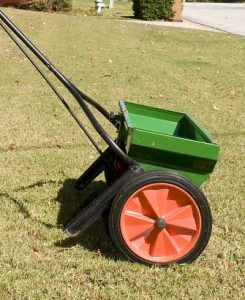 The above is a suitable method for a normal household garden lawn. For larger lawns you would be better to either bring in the professionals or hire professional scarifying equipment.
If carrying out the job manually you might be glad of the cooler weather at this time of year. Perhaps it’s just what you need to get back in condition after a lazy winter.
Just remember “Rome wasn’t built in a day”, so spread this job out if you begin to feel tired. Using a spring tine rake can be tiresome and heavy work for the elderly or unfit people and is best performed in short spells. On the other hand, it could be a great workout for the stomach muscles for those that need it.
Spring Weeding for Lawn Care
Generally there are just Two choices available to you when getting rid of lawn weeds, manual removal or chemical treatments. Manual weed removal simply means using hand tools designed for the job. A garden trowel or a special long thin trowel designed to get to the bottom of the roots of things like dandelions are handy options.
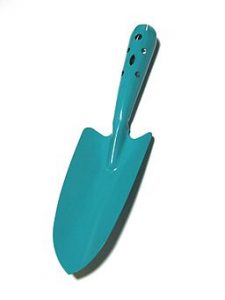 If the area is large and the problem severe the chemical treatment might be the best bet.
The chemical treatment will require an application of lawn weed killer when the grass and weeds are in growing mode.
There are many brands available to choose from. So it’s best to follow the advice on the packaging labels for whatever product you choose. In general, you will have to either use a spray or a watering can. Apply the weed killer at the recommended percentage of chemical to water.
Just a Word of Warning
Take this warning on board Don’t be tempted to use the chemical treatment to rid a newly seeded lawn of weeds. The grass on these new lawns are too weak and young to survive an application of selective weed killer. From an early age I learned not to worry if a newly seeded lawn looked like it was full of young weeds. The weeds were beneficial and indeed protected and acted as a nursery to the young grass plants.
If the ground was prepared properly prior to sowing, then there will be no bad weeds left in the soil. Any weeds starting to grow in the newly sown lawn area would themselves be young weak seedlings. Probably blown in by the wind and will be killed off naturally by the strengthening grass and regular mowing.
Not Advisable to Feed too Early
During early spring months, There is no point in feeding the lawn just for the sake of feeding, especially if the soil is high in nitrogen anyway. Creating lush green grass at this time of year can do more damage to your lawn than good. Generating top growth instead of strengthening the roots, will only give the weeds a better fighting chance to survive.
Later on in spring might be a better time, such as May to apply a weed and feed treatment. Herbicides work in such a way to perform better when weeds are growing stronger. Plus the fact that the grass will have had time to waken up and have started to grow a stronger root system. All this time strengthening itself in preparation for the heat of summer ahead.
If there are only a few difficult weeds such as dandelions, spot weed killing would be a better option. For this, you can paint the leaves with glyphosate based products. This causes the plant to take the weed killer down through the root system. To me this is a more lasting method of treating difficult to remove weeds. Roots often just break off and grow back again when attempting to dig them out.
How to Mow the Lawn in Spring
Impatience can ruin a lawn. When giving the grass its first cut during your spring lawn care maintenance, lift the blades up high enough so that only the tips will be cut.
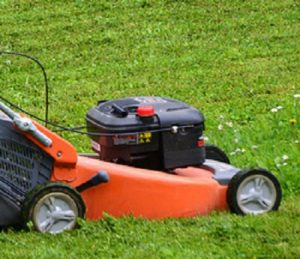 It’s almost impossible to advise a certain time of spring to do this, as so much will depend on your own local weather/growing conditions and grass types.
Depending on how much growth you have in your area, gradually lower the blades with each succession of cuts in early spring. Start to raise them up a bit again in late spring before the summer heat starts.
Again local climate will dictate your patterns. To tidy up after mowing, take a battery powered leaf blower over the path edges to tidy things up. Also remove any piles of leaves left from last season as these can cause bare patches to form on lawns if left for long periods.
To Sum Up
In our summing up we find that As we look back on those winter months and the fact that we were unable to do too much work in the garden, all was not lost. Those months gave us time to plan any overall changes we would be making to the garden when weather improved.
 But now the birds, have started to gather old withered plant material for nest building purposes. They busy themselves in the mid spring shadows, cast by a sun yet still quite low on the horizon. But rising gradually on a daily basis as we head towards summer.
With your early spring lawn care tasks completed it’s time to take a well-earned rest. You will have no doubt been very busy with all the other chores needing done around your yard and garden.
Spring is the busiest time of the year, having so much to prepare apart from the lawn. So sit back and enjoy these pleasant days. Watch the birds do all the work now and treat yourself to a nice cool drink while enjoying the efforts of your work.

